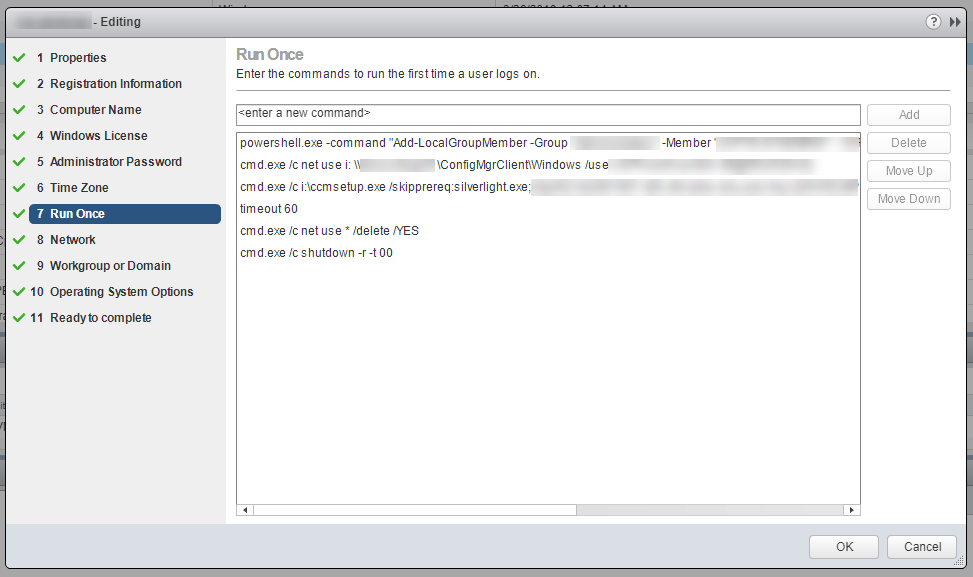
Since SCCM is our configuration management tool of choice, the SCCM client needs to get installed on all of our newly provisioned VMs.
I created a service account that only has read permission to the \\sccmserver\sms_sitecode\client share on the SCCM server. The client is installed from this location to ensure that we are always using the latest version and get rid of any need to manually copy files or put it in the template.
1. Make sure that you have your customization spec configured to log in once as administrator:

2. Add the following lines to you customization spec.
|
1 2 3 4 |
cmd.exe /c net use i: \\sccmserver\SMS_sitecode\Client /user:username password cmd.exe /c i:\ccmsetup.exe <options> timeout 60 cmd.exe /c shutdown -r -t 00 |
This maps a drive to your SCCM share using the service account, installs the client, and then reboots the virtual machine. I put a timeout (sleep) for 60 seconds in there to make sure the install has time to do what it needs to do and it is working well at this point.
3. Once the VM is created and customized and rebooted you should have a service ‘SMS Agent’ started (Automatic Delayed Start).
